noah and isetta

noah and isetta

Monday, October 27, 2014

The green alien space pod has landed.

Fresh out the paint booth!   The paint job went really smooth.   2 coats of DCC single stage color
with 2 more coats of clear over that.  Single stage paint with clear over it always looks awesome
with that deep gloss.   Still going to sand it all down with 2000 grit and polish it to a mirror finish.
Im really happy with the results so far..

Saturday, October 25, 2014

Isetta Masking Marathon

Bottom and interior all painted and masked off.  Now we're finally ready to spray the outside.
Up next!  GREEN.....

Monday, October 20, 2014

BMW Isetta Reseda Green

Ok.  For those of you who have asked for a U.S. paint code from this Reseda Green paint sample
I got from "Doc Color".   I had my paint shop run the scanner across the sample a few times.  PPG matches it up with 1956 VW color Agave Green L240 with a very high rating.    56' VW, 56' BMW.  Must of been a popular color that year in Germany!
   

Tuesday, October 14, 2014

Isetta Prime Time

Filler primer layed out!  Lots of block sanding to do now.  Not my favorite part of a paint job. 
But it's always well worth it when you see that mirror finish in the end.

Friday, August 29, 2014

Isetta bottom. cleaned and sealed

I don't think it gets much better then this!   Bottom sand blasted and sealed with DP40LF.
Just a few minor rust issues.  This is going to be easy..  Yes that's the original floor!

Sunday, August 3, 2014

doccolor der farbendoc

After lots of searching online and trips to my local paint shop with any paint code
info I could find for 1955-56 Isetta Reseda Green.  I finally came across a German website
called Doc Color.  http://www.farben-schiessl.de/isetta/farbtabelle/
"Doc"  was very helpful in helping me get an original Isetta Reseda Green paint sample.
I really almost gave up in finding a code or sample of this color.
But Doc came through and the paint sample he sent me looks to be spot on! 
Doc seems to have most all of the original Isetta paint samples as well as other microcars,
scooters, and motorcycles.   If your searching for a hard to find paint color.
He would be the guy to contact.  Thanks Doc!

Sunday, July 13, 2014

Isetta Front Spindle Assembly

I took apart the driver side front spindle first,  vapor blasted the aluminum bits,  nickel plated all the original hardware, and painted the spring housing.  Also fitted the new bushings and silent blocks.
isetta front brakes

My son Noah trying to help.. or destroy?


Nickel plated brake adjusters


Tuesday, June 17, 2014

Isetta split rim wheels restored

Radial tires with Atlas white wall inserts.  Unfortunately they don't seem to make radial white wall tires for Isettas. You can only get the white walls in bias tires.  I decided to keep the original Continental bias spare tire for my spare.  Stainless steel hardware also.


cleaned,primed and painted.  I decided to spray the wheel rims a color I have
used allot while restoring Vespa GL scooters.  This is the original color all Vespa GL
scooters where painted "avorio".   White wall tires on the way to be mounted on these rims

Isetta wheel cylinders

I attempted to restore my original wheel cylinders and after 2 days of
frustration I just decided to give up and buy a all new Isetta brake cylinder kit from Dieselmot in Belgium.
On Ebay:  http://stores.ebay.com/lkwteileanundverkauf/
http://www.dieselmot.de/

This kit is completely brand new.  I payed a total of $460.    Considering how much it costs
to have someone restore your original brake system It is pretty much the same price.
The kit arrived very fast and looks to be nicely made close to the original parts.

Friday, June 13, 2014

Isetta Pedal Assembly

Pedal Assembly
Vapor blasted housing, powder coated pedals, and re plated hardware.


Assembled on the frame

Sunday, June 1, 2014

frame strip, fix and repaint

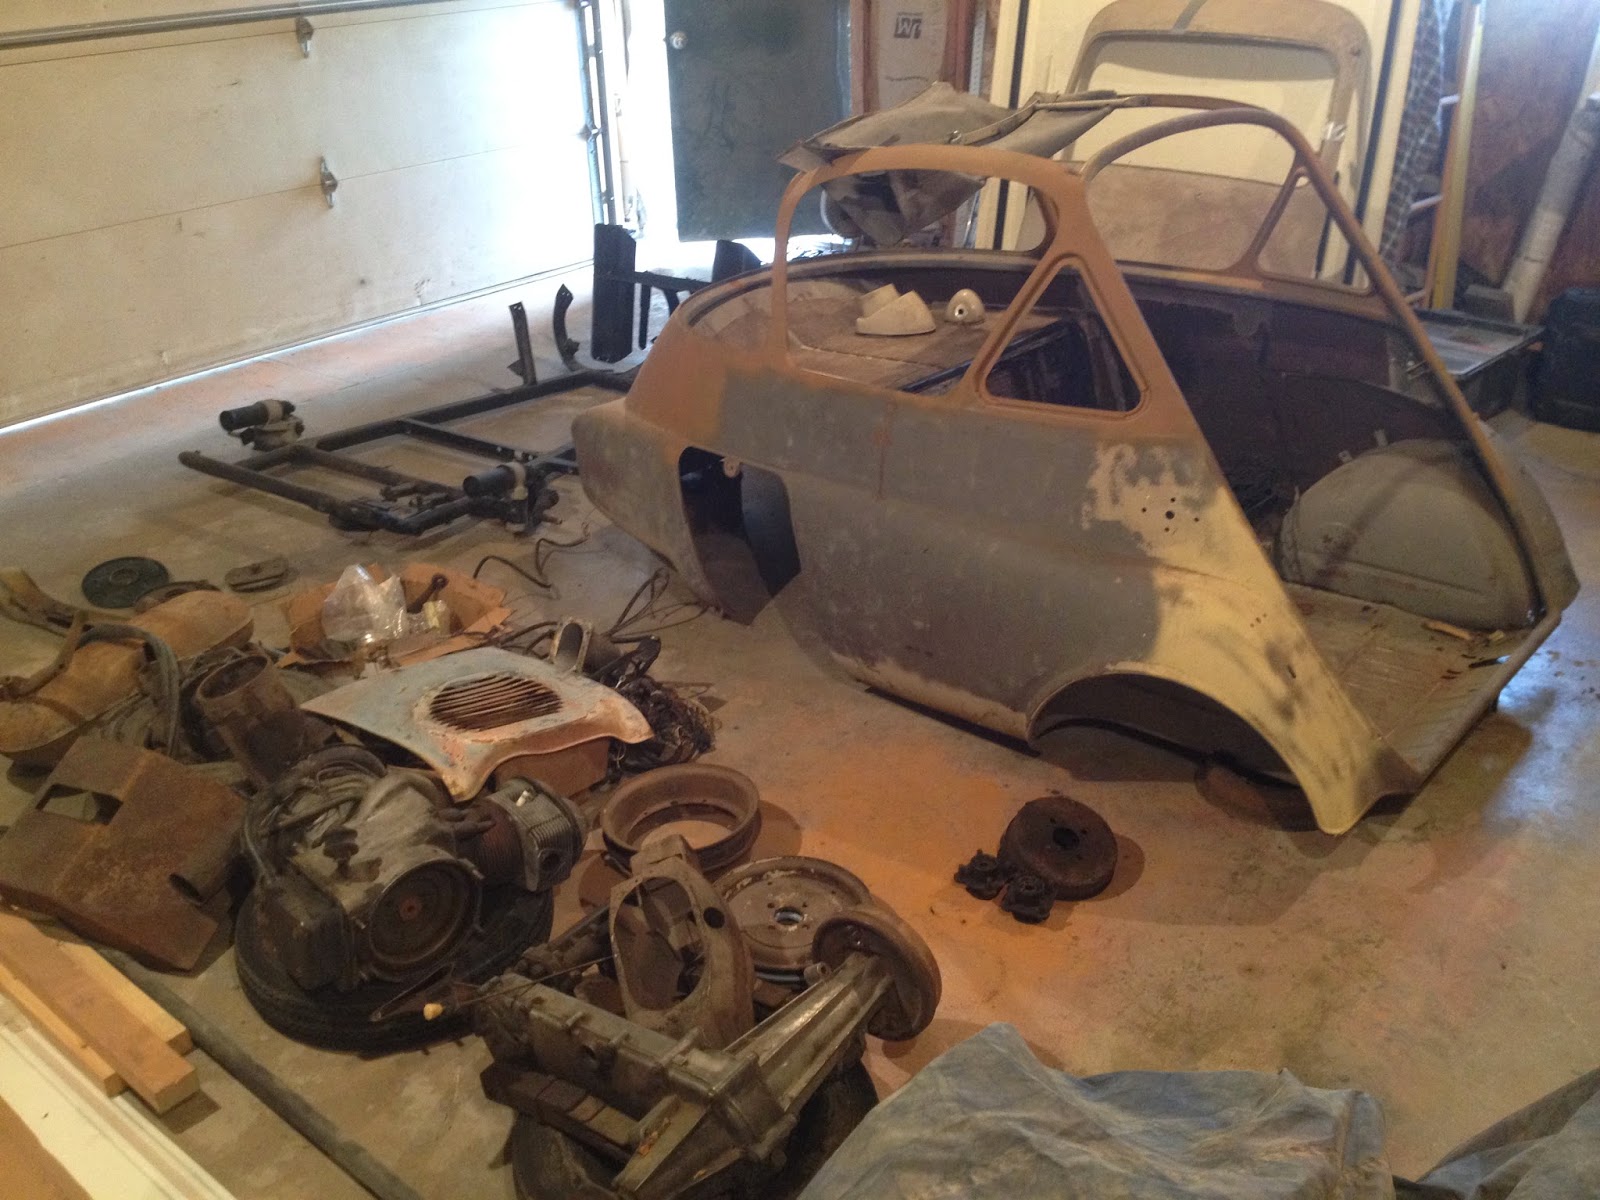
The frame had been sand blasted, primed and painted by the previous owner but of coarse it had been
sitting for a long time and needed to be freshened up.  There were also quite a few chassis /body bolts broken off in the frame that had to be heated and extracted using easy outs.
Going on to the spindles we realized the king pins and bushings were badly worn
and needed to be replaced.  So we extracted the kingpins by removing the grease zerks
at the bottom of the pin and pulled them out by using a 10M x 1 fine thread bolt, a pipe, washers and allot of heat!  Once the pins were out and the spindles were off the frame we extracted the worn out king pin bushings.
I decided to sand down the frame and respray it
using Majic oil based enamel  tractor implement paint.
Majic doesn't sell a low gloss black like I wanted so I decided to
mix 4 parts matte black with 2 parts gloss black, and extra hardener.   I ended up with a nice low gloss chassis black I was looking for.
 

Thursday, May 22, 2014

disassembly and cleaning

We started by tearing down the chain case and doing some vapor blasting.  Also started to tear down the motor.  The motor wasn't froze up and we tested the Dynastart which still worked great.  I'm willing to bet the motor would probably run with  out a rebuild but you never know it's integrity  until you open it up and inspect it.  I have all the parts on the way to completely rebuild the motor, gear box and chain drive. Thanks to Isettas R Us.   


Friday, May 16, 2014

Home in Iowa

1835 mile trip from Iowa to Tennessee and back to pick up
this little car.  I also picked up a lambretta for my father in Chicago on the way.
Can't wait to get started on the bubble.  It's going to be a fun project